The Resync student roster button is available for teachers using Book Taco with Clever integration. It updates your Book Taco classroom roster to match your current Clever roster, so newly added or removed students in Clever are reflected in Book Taco.
How to Resync your classroom roster from Clever
Step 1: Launch Book Taco from Clever
Log into your Clever portal and launch Book Taco by clicking the app icon.
Step 2: Go to My Class and click Resync
- Go to the My Class page.
- Click Resync student roster.
- Your roster will update to match your current Clever roster. New students will be added and removed students will be marked inactive.
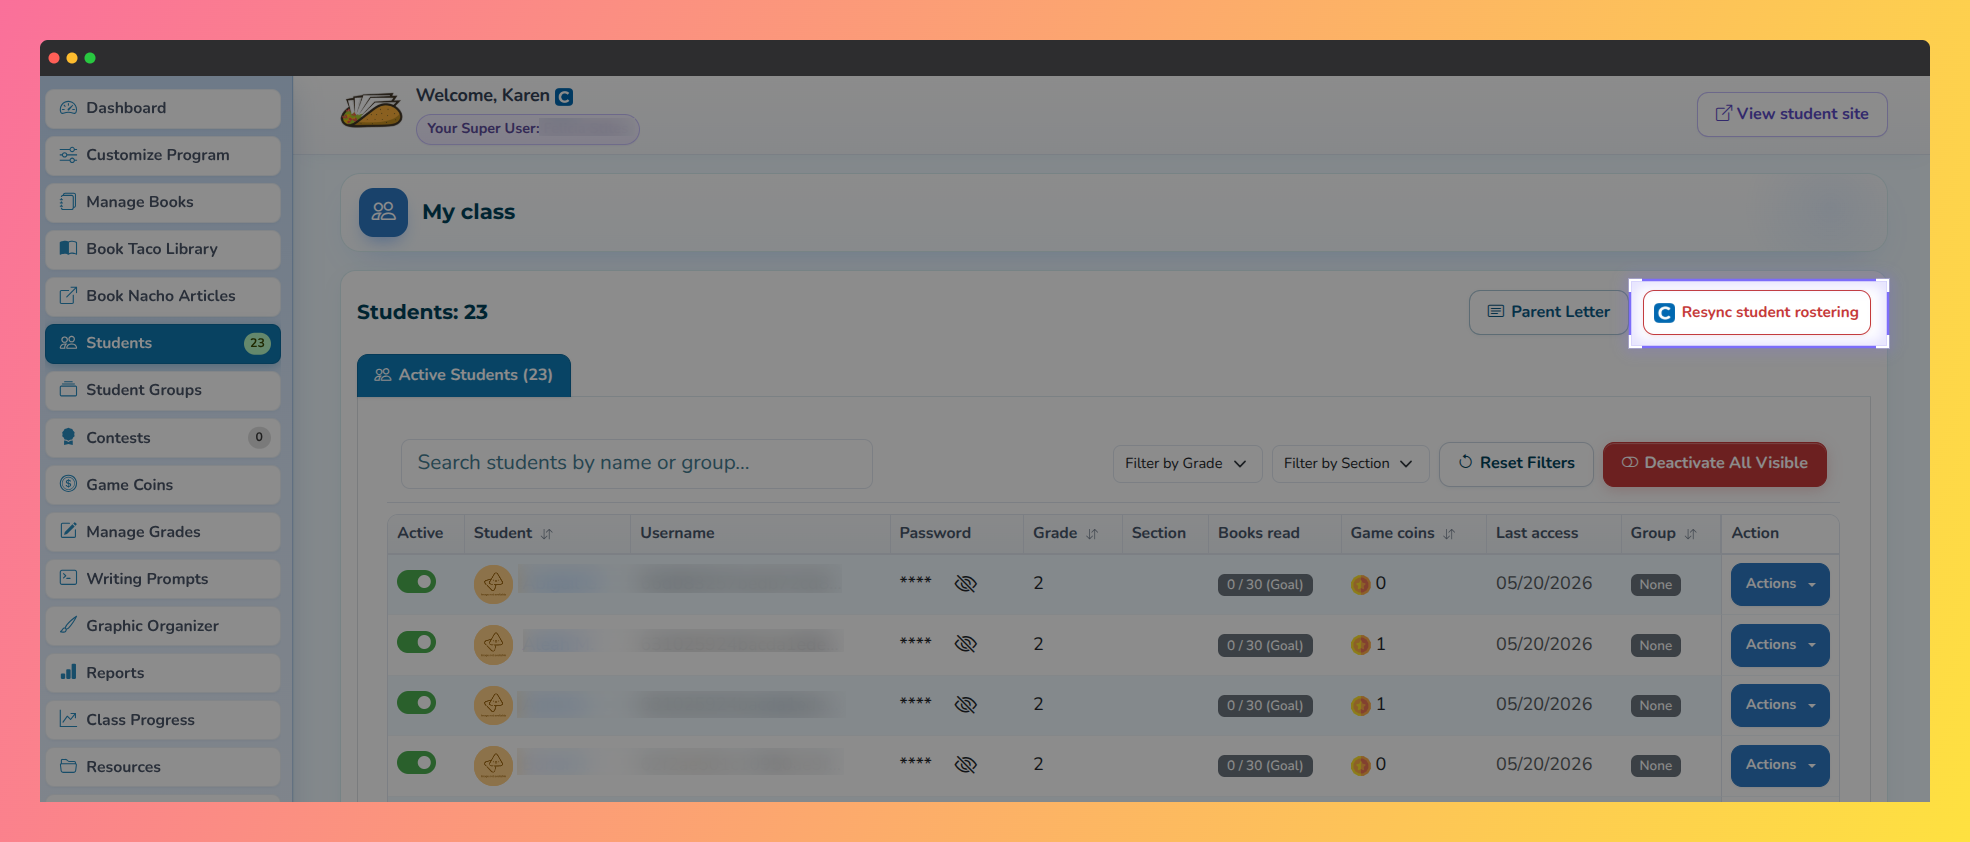
Pro Tip: After resyncing, use the My Class filters (search, status tabs) to quickly review changes and manage your roster as needed.
When the Resync button is disabled
If the Resync button is disabled, it will appear grayed out and cannot be clicked. There are two main reasons why this happens:
1. You did not launch Book Taco from Clever
- You must open Book Taco directly from the Clever portal.
- Logging in from a bookmark, shortcut, or directly from the Book Taco website may not create the live Clever connection needed for syncing.
2. A Super User is logged in as you
- Super Users cannot trigger a Clever resync on your behalf.
- You must log in to your own account and launch the app from Clever to resync your roster.
How to fix it
To activate the Resync button:
- Log out of Book Taco completely.
- Go to your Clever portal.
- Launch Book Taco by clicking the app icon.
- Go to My Class and confirm the Resync student roster button is now enabled, then click it.
Tooltip display
If the Resync button is disabled, you will see a tooltip on hover explaining why:
Note: Only you can resync your roster. You must log into your own account and launch Book Taco directly from Clever to enable syncing. If the button is disabled, check that you launched from Clever.
Still stuck?
If you followed all steps and the button remains disabled:
- Take a screenshot of what you are seeing, including the My Class page header area where the button appears.
- Contact our support team and we will help you resolve it quickly.
Was this article helpful?
That’s Great!
Thank you for your feedback
Sorry! We couldn't be helpful
Thank you for your feedback
Feedback sent
We appreciate your effort and will try to fix the article