The Bulk Student Upload feature lets you add multiple students to your class at once from a spreadsheet or by pasting data. You can add new students, restore deleted students, or add existing students to your class all in one step.
How to bulk upload students
- From the Students page, click the Bulk Upload button.
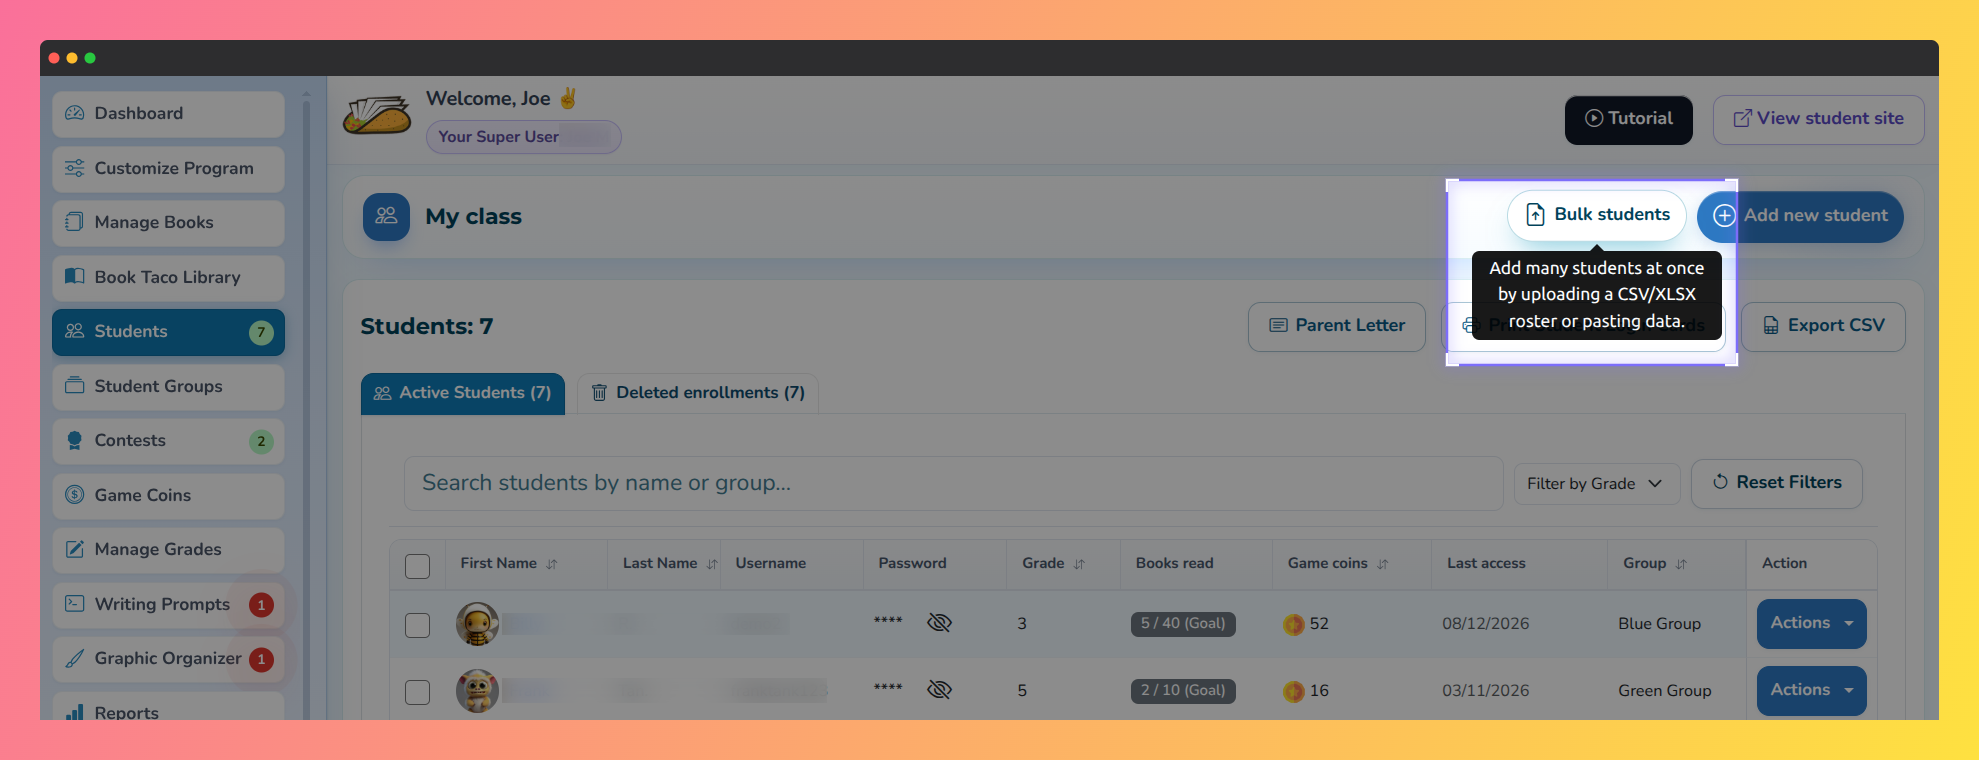 Screenshot of the teacher dashboard highlighting the "bulk students" button.
 - A modal window opens with two options:
- Upload a file — Choose or drag a .csv, .xlsx, or .xls file.
- Paste data — Copy and paste comma-separated student data directly into the text field.
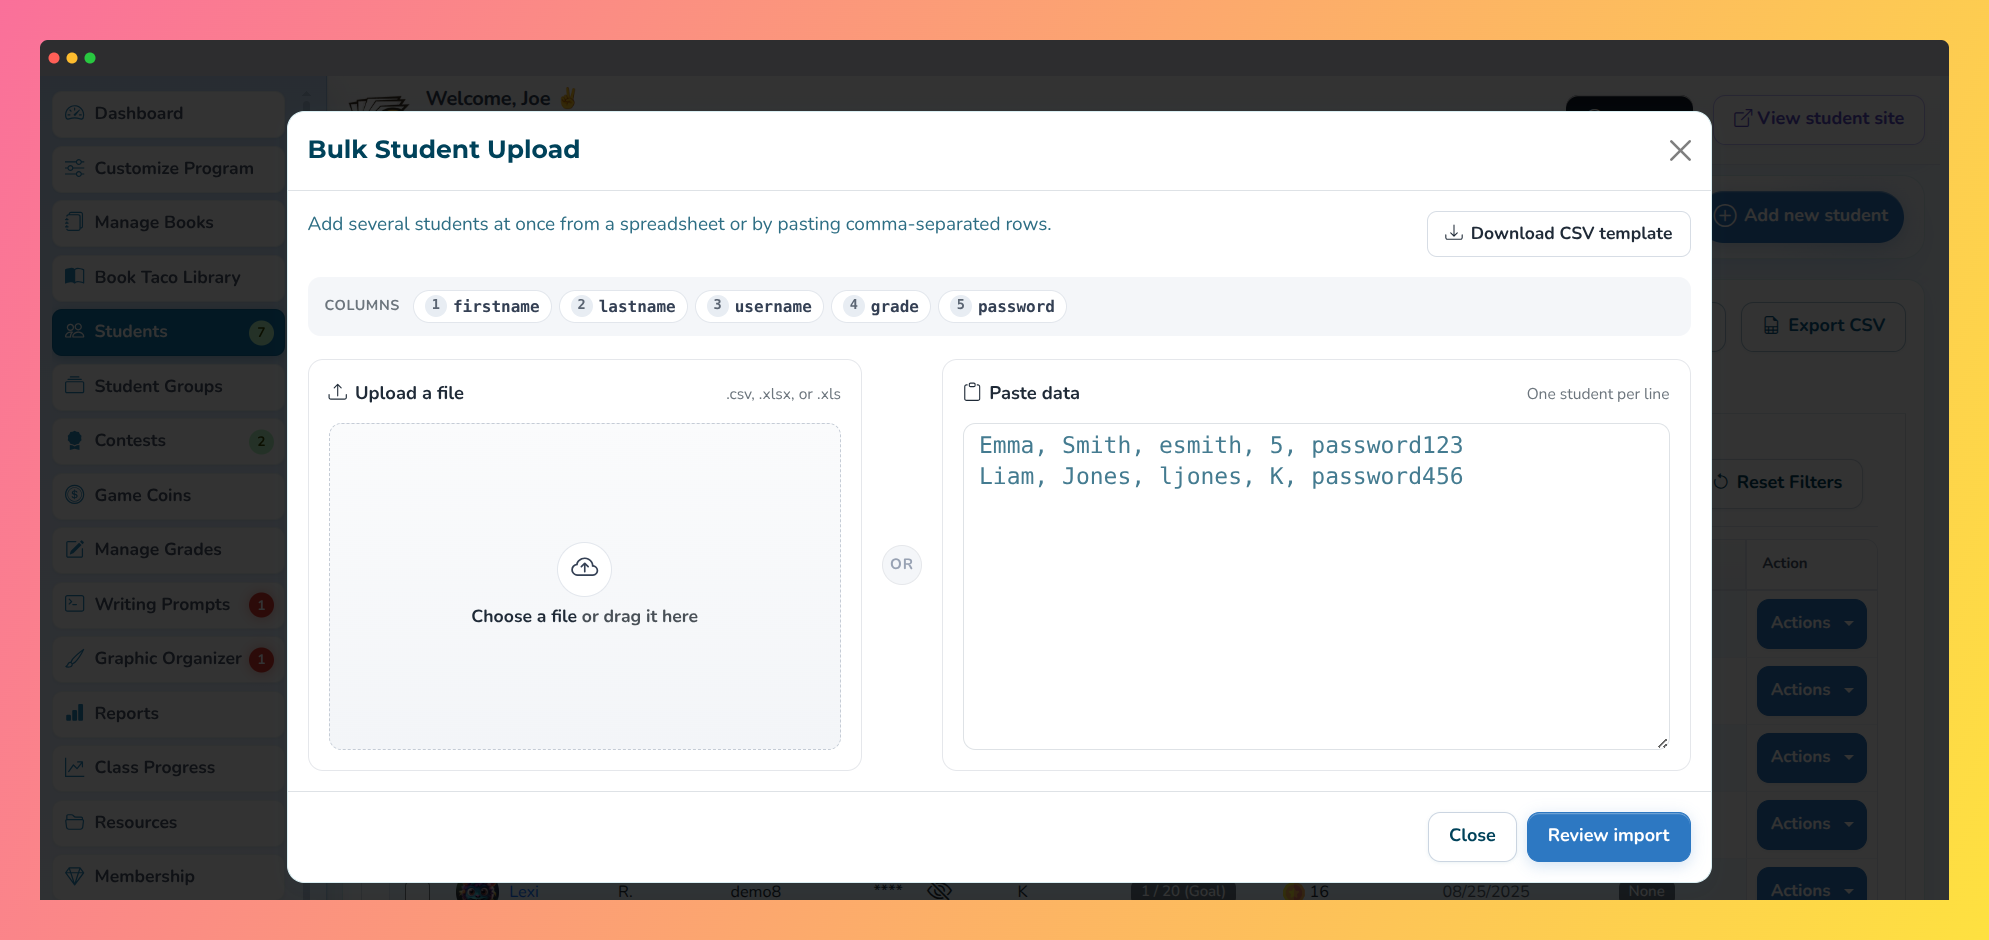 Screenshot of the teacher dashboard highlighting the Bulk Student Upload modal.
- Click Review import. The system checks each row and shows a summary of what will happen.
- Review the list carefully. Each student has a status (see Understanding import statusbelow):
- Will be created — A new student account will be created.
- Existing — will be restored — A deleted student will be re-added to your class.
- Existing — can be added — A student who already has an account will be added to your class.
- Cannot be added — The student cannot be added (see Troubleshooting rejected students).
- If needed, you can click the edit icon on any row to change first name, last name, username, grade, or password before importing.
- Click Confirm import to complete the upload. All students with a status other than "Cannot be added" will be added to your class.
File format and template
Bulk upload expects data in this order (no header row required):
First Name, Last Name, Username, Grade, Password
Example:
Emma,Smith,esmith,5,Taco123
Liam,Jones,ljones,K,password456
Sofia,Garcia,sgarcia,4,Read2026
Download a template
The Bulk Upload modal includes a link to download a CSV template. Use this as a starting point for your student list — it has the correct format and column order.
File type support
You can upload files in these formats:
- .csv (comma-separated values) — Most common spreadsheet format.
- .xlsx (Excel) — Modern Excel format.
- .xls (Excel) — Older Excel format.
You can also paste data directly without uploading a file — just type or paste comma-separated rows into the text area, one student per line.
Understanding import status
| Status | Meaning | What happens |
|---|---|---|
| Will be created | A new student with this username does not exist. | A new student account is created with the name, username, grade, and password you provide. |
| Existing — will be restored | This student was deleted from your class but still has an account. | The student is restored to your class. The name and password remain unchanged from the account. |
| Existing — can be added | This student already has an account on your school domain. | The student is added to your class. Only the grade from this import is applied — their first name, last name, and password are NOT changed. |
| Cannot be added | The student cannot be added to your class. | The student is skipped. See Troubleshooting rejected students for why. |
What happens to existing students
If a student already exists in Book Taco (marked as Existing — can be added), the import works differently:
- Grade is updated — The grade you provide in the import replaces their current grade in your class.
- Name and password are NOT changed — Their existing first name, last name, and password remain as they were. Only the grade changes.
- Why? — Because the student is already known to the system, changing their name or password could cause confusion or break their existing account data in other classes.
Tip: If you need to update a student's name or password after they're imported, edit them individually from the student roster.
Editing rows before import
Before you confirm the import, you can edit any row in the review table:
- In the review table, find the student row you want to change.
- Click the edit icon (pencil) at the end of the row.
- Edit any field: first name, last name, username, grade, or password.
- Click outside the editing area or press Enter to save your changes.
Editing a row does NOT change the import status (e.g., "will be created" stays the same). Only the field value changes.
Troubleshooting rejected students
A student might be marked as "Cannot be added" for one of these reasons:
1. You do not have enough available seats
Each teacher account has a limited number of student seats. If you've reached your limit, new students cannot be added until you delete some existing students or request more seats from your administrator.
Solution: Delete students you no longer need, or contact your Super User or school administrator to increase your seat allocation.
2. Duplicate username in the import file
If you try to import two students with the same username in the same file, the duplicate is rejected (only the first is accepted).
Solution: Check your spreadsheet and make sure every username is unique. Re-import the file after fixing the duplicate.
3. Missing or invalid data
If a row is missing required fields (like username or grade), it may be rejected.
Solution: Make sure every row has all five columns filled in: first name, last name, username, grade, and password. You can leave fields empty only if allowed by the system.
Tip: In the review step, you can edit rejected rows to fix them before confirming the import. Change the data and the status may update.
If you continue to have trouble, contact your Super User or school administrator for help.
Was this article helpful?
That’s Great!
Thank you for your feedback
Sorry! We couldn't be helpful
Thank you for your feedback
Feedback sent
We appreciate your effort and will try to fix the article